Bread and Fermentation Class Open Enrollment

rp_fermentation-1-300x225.jpg

Come and learn about the significance of the gut microbiome and how to care for it with the skill of preserving through fermentation of veggies, salsa, fruit and bread. The workshop is $15. You’ll get to taste lots of delicious fermented foods and take home your own sourdough starter.  Class will be held August 1st at 1 PM. Deadline to sign up is July 25th.

Did you know that what you eat and how you live directly impacts your health and how you feel? For every cell we have in our body there are 10x more bacteria, viruses, fungi and protozoa that are all talking to our mitochondria, coordinating repair and growth. We are only 1% human… the rest of us is an ecosystem that works harmoniously with our body if we are treating them right. Those little critters are the control center of the body, regulating hormones, inflammation, brain chemistry and what we do or don’t absorb. We know that 70% of our immune system is in the gut, where health begins. Our gut health even impacts our brain activity because more gaba and serotonin are produced in the gut than the brain. For every 1 message our brain sends to our gut, our gut sends 9. These messages include the activation of our immune system, the growth of new brain cells and the adaptability of these new cells to learn. More science is finding that our gut microbiome is critical to whether or not we experience chronic illness and impacts the health of our future. Come and learn what foods trigger inflammation and which foods to eat more of. We will learn the simple skill of fermenting vegetables like kimchi and salsa, fruit chutneys and even fermented bread which lowers the gluten content significantly. Seating maximum for this class is 25. No refunds available after the deadline. Cost goes to food purchased for the class.

Class Price – $15

Sign up here.

Herbal Workshops and Walks for June through September Now Enrolling

rp_Emily-teaching-an-herb-class-300x225.jpg

I have updated the herbal workshops and herb walks schedule for June through September. Check out my events page for more details. Classes include:
Basic Herbal
Fermentation Bread and Vegetable/Fruit Class
First Aid Herbal
Family and Children’s Herbal

Let me know if you have any questions! Hope to see you there!

Basic Herbal Workshop and Herb Walks – Enrolling Now!

Herbal collage

Enrolling now for the basic herb workshop and herb walks in June!

Come and learn the basics of herbal medicine. We will learn how to identify and use the plants we see, grow and harvest. Even if you have taken this class before you can always join us. There is something to learn for everyone. We will start with an herb walk on Friday June 26th from 9:30 A.M – 12:30 P.M., meeting at the mouth of Lamb’s canyon (exit 137) just off of I-80 up Parley’s canyon. We will spend a few hours identifying and talking about the plants we find. On Saturday morning we will start with another herb walk at my home from 10:00 A.M. – 12:00 P.M. There will be a 1 hour break for lunch (on your own) and then we will meet back at my house for the hands on portion of our class from 1:00 P.M – 4:00 P.M.  We will go over how to make the following herbal medicine that will give you a broad range of uses:

Infusions (herbal tea)
Decoctions – Syrups
Herbal Vinegars – Oxymels
Poultices
Infused Herbal Oils – Herbal Salves
Creams/Lotions
Glycerite/Tincture/Elixir

You will go home with 6 items from the class. (syrup, oxymel, poultice blend, salve, cream, and tincture). Price is $40 including the herb walks and hands on class. There is also an option to just do the herb walks for $20. Class capacity is 20 to maintain social distancing. If you are unable to attend the hands on class you can pick up your kit at your convenience.  No refunds. Deadline to sign up for the workshop is June 20th.  Please sign up through my events page. Feel free to send any questions you may have through my contact page.

rp_Emily-teaching-an-herb-class-300x225.jpg

Women’s Health Herb Walk

vitex

Women’s Health Herb Walk

I will be holding an herb walk on Saturday May 23rd at 10 AM in West Jordan. The cost is $10. We will be focusing on women’s health specifically. Please reach out through my contact page if you are interested in joining us. Spots are limited to maintain social distancing.

Picture is Chaste berry or Vitex agnus-castus


Herbal Women’s Retreat and Herb Walk

rp_springville-canyon-pic-300x225.jpg

I still have room in the retreat for May 28th through the 30th in Spanish Fork UT! The cost is $295. We are still going to go forward with it now that we can be in groups of less than 20. Our group will be small and we would love to add a few more. Please send me a message through my contact page if you are interested.  I will also be holding an herb walk at my home in West Jordan on May 23rd as an extension of the retreat. If you would like to just join is for the herb walk on the 23rd and not the retreat the cost for the herb walk is $10.

Here is our tentative itinerary for the retreat! Hope you can make it!

Thursday May 28th

4:00 pm – Check in

5:00 pm – Let’s get to know each other game!

5:30 pm – Prep for dinner

6:00 pm – 7:00 pm – dinner and clean up

7:00 pm – How to decrease stress in our lives seminar

7:30 pm Gentle yoga stretch and guided meditation

8:30 – Bedtime – free time and swimming until 10 pm. Quiet time after 10 pm. Lights out by midnight we will be hiking the next day.

Friday May 29th

8:00 am – Breakfast and clean up

9:00 am – Herb walk/hiking

12:00 pm – Prep and eat lunch

1:00 pm – 4:00 pm – Hands on herb making class.

4:00 pm – 5:00 pm – Free time

5:30 – Prep for dinner

6:00 pm – 7:00 pm – Dinner and clean up

7:00 pm – 8:00 pm Guest speaker

8:00 pm – Yoga stretch and guided meditation

9:00 pm – 12:00 am Lights out by midnight.

Saturday May 30th

8:00 am – 9:00 am power yoga class

9:00 am – 10:00 am prep, eat and clean up breakfast

10:00 am – 11:00 am – pack up, clean up and check out

Sourdough Buns

Sourdough Buns

These buns are so good! They are perfect for pulled meat sandwiches or burgers and even a side roll with dinner. I love the crumb and flavor with these.

Recipe

1/2 cup starter

2 cups coconut milk

1/4 cup coconut oil

2 teaspoons sea salt

6 cups white wheat flour or more if needed.

Mix together the starter, coconut milk, oil and salt in a large bowl. You could also use 2 cups water and 1/2 coconut milk powder. Add half the flour and mix well. Add the remaining flour and mix by hand until fully incorporated and the dough is tacky. If the dough is still too wet add a little more flour 1/4 cup at a time. Cover the bowl with plastic wrap and let rise on the counter for 12 to 24 hours.

Once the bread has risen and ready to shape, use avocado or coconut oil to oil the counter. Cut the dough into 14 large round balls about 1/4 cup or so each. Pinch the dough together at the bottom of the roll. You could also make more by making them smaller.

Sourdough Buns 2

Let rise for 1-2 hours until they have doubled in size and are nice a big. Cut the bread to vent and spread the rolls with melted butter. Bake at 375 degrees for 35 minutes.


Caring For Your Natural Yeast Starter

sourdough starter 1

It is amazing to me that I have been able to keep my natural yeast starter alive for years. I learned a few tricks that make it easier and happy to share them with you.  I bought my starter from a friend who bought it from another friend who said it is a strain that is over 200 years old from Czechoslovakia.  Take it for what it’s worth, my experience has been that this is the best mild tasting natural yeast I have ever baked with.

*

First, my starter is fed with a biologically grown whole wheat white flour (no pesticides are used). You could use an organic white flour too. I have tried other grains and it just doesn’t do as well. White flour is best.

*

Second, when adding water to your yeast you must never use chlorinated water. This kills the yeast 9 times out of 10. If all you have is chlorinated tap water let it sit on your counter for an hour so the chlorine dissipates.

*

Before each use stir your starter.  If you haven’t used it in a while pour off the liquid (ethanol) and scrape off any gray dough. Stir and use. If it has been a month (or two) between uses consider taking out ½ cup, discard the rest, and feed with 2 cups flour and 2 cups water to renew and boost. (You may need to transfer to a bowl). Leave on the counter overnight, it should bubble up and smell good. From there you can use it. Do not keep your starter in any metal container. Glass or ceramic is best.

*

Feed it after each use. Make it thick enough so a stirring stick or spoon can stand on it’s own so it has plenty of food to eat and keep in the fridge. We make 6 loaves of bread at a time. This takes out 1 and 1/2 cups of the starter from the jar. I usually feed it 1 cup water and 1 and a half cups flour to make it thick. The measurements do not have to be exact. I put plastic wrap over mine because it does need some air to grow unlike other fermented foods. From the picture above you can see that I have removed the rubber liner on my large jar. I allow the lid to sit un-closed on the jar and place in the fridge.

*

If you are interested in purchasing some of my sourdough starter in a quart sized Mason jar for $8 send me a message from my contact page. Starters are for sale for pick up only in Utah.

The Healing Art of Herbalism Basic Course for Beginners Videos

Emily teaching an herb class

This past summer I put together 6 basic videos on an introduction to medicinal herbs. With everything that is going on in the world I thought I would share them here on my website hoping it gives others some inspiration to grow an herb garden big or small this year with the extra time many will have at home. Fair warning it was my first time putting together my own videos on you tube. It was a challenge, but I hope you are able to look past imperfections and enjoy the content. Please let me know if you have any questions.

You can find the videos under my media page. https://rootedemily.com/media/

Update! Early Bulk Food and Herb Order

Bulk Food Storage

I moved my bulk food storage order to March 12th. Please have your orders and money in by NOON on that date.  Orders are for pick up only in West Jordan Utah.

List here for items and prices https://rootedemily.com/food-storage/

I also have a new page with bulk herbs and other items with prices https://rootedemily.com/starwest-botanicals-bulk-herbs-spices-tea-blends-extracts-and-more/

This will be the only time we place an olive oil order for the year.

Let me know if you have any questions.

Herbal Remedies & Appropriate Dosing

10-ancient-medicinal-herbal-remedies-that-actually-work

I get questions almost every single day as to how much and what type of herbal remedy a person should take. I refer to this chart often from Rosemary Gladstar with a few minor tweaks and additions that I prefer. I will also describe the different options of herbal remedies you can use successfully with basic directions. The key to successful results with herbs is that you must take them as early as you can, often during the illness duration and after you start feeling better. Hopefully you can find this information as valuable as I have.


Infusions & Decoctions

Chamomile Tea

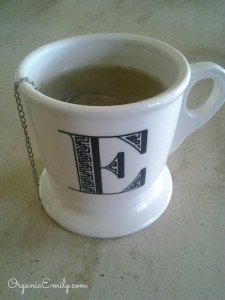
A tea or infusion is made by boiling purified water and pouring it over loose herb, usually leaves and flowers, or herbal tea bags in a cup or even a quart jar. Once the hot water is poured over the herb, cover it so the volatile oils are preserved. Steep for 15 minutes for a mild tea or 30 minutes for a strong tea.  A decoction is made with roots, seeds and barks. These materials usually need a little more heat and time to extract the medicinal qualities into the water. Simmer the plant material on low heat for 20 – 30 minutes with the lid on the pan. Strain and use like an infusion. You can make a quart of tea once a day and drink it throughout the day. When an adult dose is 1 cup…

Age 

Younger than 2 years – ½ – 1 teaspoon

2 – 4 years – 2 teaspoons

4 – 7 years – 1 tablespoon

7 – 11 years – 2 tablespoons

For chronic issues use 3-4 cups daily for 5 days, rest for 2 days, then repeat for several weeks, or until the problem is corrected.

For acute issues use 1/4 – 1/2 cup throughout the day up to 4 cups during illness and a day or two after you start feeling better.


Tinctures & Glycerites

Tincture 6

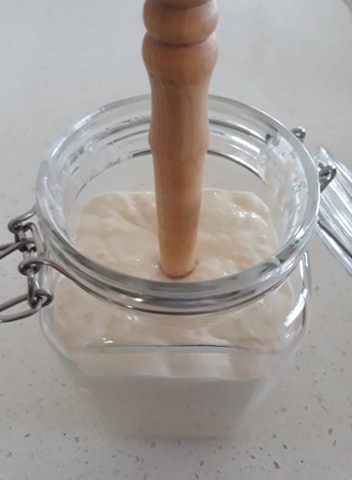
A tincture is made with fresh or dried herbs. I like to use a 1:5 ratio usually. For example if I wanted to make a yarrow tincture I would place 100 grams (you can use ounces too) of dry yarrow herb in a pint jar and 500 milliliters of 50% or 100 proof alcohol. I also like to blend up the herb to create more surface area for better extraction. Cover and shake once a day for 4 weeks. Strain and press out as much of the tincture as you can. I discovered using a potato press works well lined with a coffee filter. Label and date. Tinctures are preferred for their long shelf life and fast acting results. Glycerites are used for little children and babies or those who cannot use any alcohol. I like to use a 1:1 ratio of purified water and organic glycerin. Use the same measurements as the tincture directions. Glycerites must be kept in the fridge and only halve a shelf life of 2-3 years. When an adult dosage is 1 teaspoon (60 drops)…

Age 

Younger than 3 months – 2 drops

3 – 6 months – 3 drops

6 – 9 months – 4 drops

9 – 12 months – 5 drops

12 – 18 months – 7 drops

18 – 24 months – 8 drops

2 – 3 years – 10 drops

3 – 4 years – 12 drops

4 – 6 years – 15 drops

6 – 9 years – 24 drops

9 – 12 years – 30 drops

For chronic issues use 1/2 -1 teaspoon 3 times daily for  5 days, rest for 2 days, then continue for several weeks, or until the problem is corrected.

For acute issues use 1/4 – 1/2 teaspoon every 30-60 minutes during an illness and for another day or two after you start feeling better.


Syrups & Oxymels

Sage, thyme and Horehound Cough Syrup

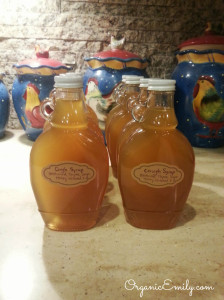
Syrups are made by making an infusion or decoction of your choice of herbs and then strained into a large measuring cup. Add equal amounts of honey or glycerin and half part brandy if you like to extend the shelf life. Keep in the fridge for up to 6 months. Oxymels are very similar, except you would macerate or soak herbs in warm apple cider vinegar for 4 weeks like a tincture. Then strain and add equal amounts of honey. Also keep oxymels in the fridge for up to 6 months. When 2 tablespoons is an adult dose…

Age                                                                                                                                        

Younger than 2 years – 1/4 – 1 teaspoon

2 – 4 years – 1 teaspoon

4 – 7 years – 2 teaspoons

7 – 11 years – 1 tablespoon

For chronic issues use 1 2 tablespoon 3 times daily for 5 days, rest for 2 days, then continue for several weeks, or the problem is corrected.

For acute issues use 1 teaspoon every 30-60 minutes during an illness and for another day or two after you start feeling better.

Capsules or  Tablets 

When an adult dose is 4 capsules. Cut in half for children under 12 that can swallow a capsule.

For chronic issues take 4 caps 2x a day for 5 days, rest for 2 days, then continue for several weeks until symptoms subside.

For acute issues take 4 caps 3 -4 times a day for a few days after you start to feel better.