Growing and Using Herbs: Cilantro

cilantro

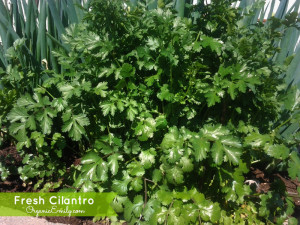
There aren’t too many things that are better than fresh homemade salsa with cilantro form the garden!  It also has some amazing health benefits too!   This is a picture I took back in May from cilantro seeds I grew last fall.  It had only come up maybe an inch before the weather got cold and the days became shorter and stopped growing.  As the snow covered the ground during the winter it helped to insulate the little cilantro leaves just enough to protect it from the hard cold temperatures we had.


Cilantro is known for being an effective toxic metal cleanser! It is a powerful herb with natural cleansing properties. The chemical compounds in cilantro bind to toxic metals and loosen them from the tissue. Many people suffering from mercury exposure report a reduction in re-occurring feelings of disorientation after consuming large and regular amounts of cilantro over an extended period. Make sure the cilantro you use is organic, otherwise it may have already pulled those toxins into the plant!  The best way to know for sure is to grow it yourself or buy from a reliable organic source!  Cilantro also has strong antioxidant properties, has been known to aid in improving sleep and also has very strong anti-fungal and anti-bacterial properties.


I often get the question, “How can I make my cilantro last a little longer in the garden? It always seems to bolt quickly.”  It can bolt quickly, especially when the temperatures become warmer.  I plant my cilantro seeds (coriander) every two weeks so I am constantly harvesting throughout the growing season. It also reseeds itself very easily if you let it flower and allow the flowers to dry and produce seed.  The seeds you sow in the spring will produce more seed from mature plants.  As they drop to the ground you may find new little cilantro plants start to come up in the fall and even the following spring.  Cilantro grows well in rich, well draining soil and does not like to be removed once it has been planted either by direct seed or transplanting.  It prefers full sun, but will grow in some shade too.  Sow the seeds 1/2″ deep and thin every 4-6 inches.  When using cilantro for cooking, use the young leaves that are broad and shiny.  They tend to be less bitter and add incredible flavor to many dishes!  Here are a few of my favorite recipes using cilantro!


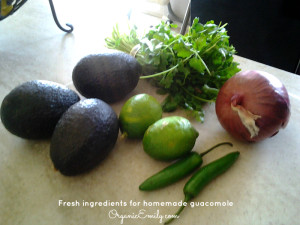
Ingredients for guacomole

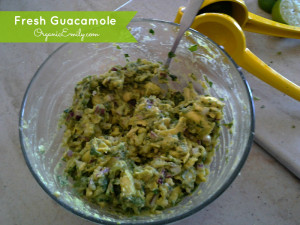
Fresh Guacomole

Recipe:

This homemade guacamole is so good, you may find that after one taste, there won’t be any left to share with others!  This is one of our family favorites and it is so good for you!
4 medium or 3 large ripe avocados, smashed
1/2 red onion, finely chopped
2 serrano peppers, seeded and minced (add more seeds later to increase heat)
2 limes, juiced
1 bunch cilantro, chopped
salt and pepper to taste
Mix all ingredients together in a medium size bowl and serve with organic corn chips or on a whole grain tortilla!  Delicious!
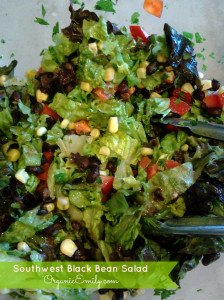
Southwest Black Bean Salad
A delicious and refreshing salad!  A great addition to any meal!

Recipe:

8 cups shredded red leaf lettuce (1-2 heads)
2 cups cooked or canned black beans, rinsed and drained
2 cups bite-sized sweet red pepper strips
2 cups frozen or fresh corn kernals
1/4 cup cilantro (about 1 bunch)
1/4 cup orange juice
1/4 cup cider vinegar
1/4 cup organic canola oil
1 teaspoon ground cumin
1/2 teaspoon sea salt
1/8 teaspoon red pepper flakes
Combine in large bowl the lettuce, beans, peppers, corn kernels and cilantro.
For dressing combine the remaining ingredients listed in a tightly sealed jar or Tupperware bowl and shake until mixed well.  Drizzle over salad.  Eat immediately.
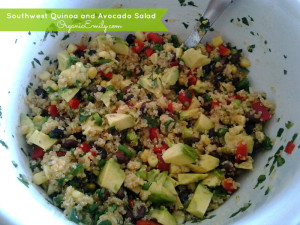
Southwest Quinoa Salad
Perfect for lunch or a side for dinner!  This super healthy and delicious recipe is so simple!  I got it out of one of my favorite recipe books called, “Quinoa, The Everyday Super Food”.

Recipe:

2 cups water
1 cup quinoa, uncooked
1/3 cup olive oil
1/3 cup freshly squeezed lime juice
4 tsp. apple cider vinegar
2 1/2 tsp. ground cumin1 jalapeno, seeded and minced
1 1/4 cup frozen corn kernels, thawed
1 chopped red bell pepper
1 (15oz.) can black beans, rinsed and drained
1/3 cup chopped fresh cilantro
2 avocado,s chopped
sea salt and pepper to taste
Cook quinoa with the water in a rice cooker or on the stove like you would rice.  While that is cooking. mix together the olive oil, lime juice and vinegar in a small bowl.  Once the quinoa has finished cooking and has slightly cooled, place the dressing over the quinoa in a large bowl and allow the warm quinoa to infuse the flavors.  Chop and add the rest of the ingredients to the quinoa and check to see if more salt and pepper is needed.  Can be kept in an airtight container for up to 3 days in the fridge.

Growing and Using Strawberries

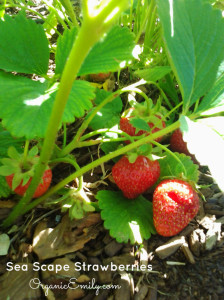
Sea Scape Strawberries

Every garden should have a small strawberry patch in my opinion!  Nothing beats the burst of flavor from a home grown strawberry!   They are easy to grow in a container or in the ground.  Most strawberries produce their best within their first 5 initial years.   There are 3 different types of strawberries:

  • June-bearing – produce an abundant crop one time in June.  Good for making jam or canning.
  • Ever-bearing – produce in the late spring and late summer.  Can produce during the middle of the summer if temps are cool enough to allow the plant to set flowers.
  • Day-neutral – once established and have reached maturity, the plants will produce all summer long, increasing yields with cooler temps.

All varieties require at least 8 hours of sunlight to produce good fruit.  Strawberries prefer well-draining, rich soil that has been amended with lots of organic matter.  They can be susceptible to root rot if grown in heavy wet soil.  The best time to buy strawberry plants is in the early spring in bare-root form.  They usually come in bundles of 10.  Make sure the roots look healthy and have stayed moist.  Larger potted plants are more expensive and do not produce more than less expensive bare-root plants.

After the first year, the first daughters (or runners) can replace the original mother plant.  This keeps the fruit production high and the size large.  Remove any other runners that come off the 1st daughters.
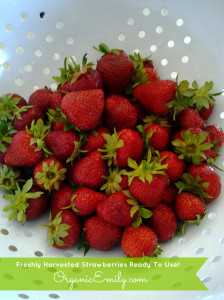
 

Harvested Strawberries

  I grow an ever-bearing variety called “Sea Scape” for it’s large berries and wonderful sweet flavor.  Just this year so far I have harvested about 4lbs.  Here are just a few recipes we love using our own home grown strawberries!
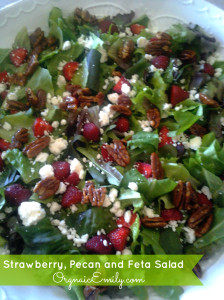
Strawberry Pecan Feta Salad

This simple and beautiful salad will impress anyone over with it’s candied pecans, fresh strawberries and creamy feta cheese!  I love to serve it with a homemade strawberry balsamic vinaigrette!

Strawberry, Pecan, Feta Salad

Serves 8

1 cup candied pecans

2-4 T. agave

2 lbs. fresh strawberries, hulled and halved or quartered depending on size (reserve 1/3 cup berries for dressing)

12 cups fresh greens from the garden or organic spring mix

1 (7-ounce package) crumbled feta cheese or more if you like

Spray a large skillet with non-stick cooking oil.  Add the pecans and agave.  Stir continuously until thickened and the pecans are coated well.  About 10 minutes.  Be careful not to let them burn.  Remove from heat.Prepare the greens, strawberries and feta in a large salad bowl.  Add the pecans once completely cooled.  Just before serving, drizzle the dressing and toss.


Strawberry Balsamic Vinaigrette

Mix 1/2 cup olive oil, 1/3 cup strawberries, 3 T. balsamic vinegar, 1 T. sugar and salt and pepper to taste in a blender.  Pulsing a few times leaving a few chunks of strawberries.  Drizzle over salad just before serving.
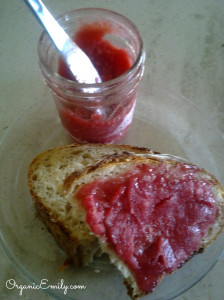
 

Strawberry Freezer Jam

Freezer jam is so easy to make!  No hassle and it’s quick!  It has less sugar than other preserves, making it a healthier alternative without the loss of flavor!  Try eating some with my Rustic Rosemary Loaf!  https://rootedemily.com/?p=197

Strawberry Freezer Jam

4 cups mashed strawberries or fruit of your choice.  I like to use my blender.

1 cup organic sugar

1/3 cup instant clear gel

Mix together the sugar and clear gel then add the berries.  Place in jars of your choice, leaving a 1″ head space.  Place the lid on and freeze!  Can be kept in the freezer for up to 6months.


Strawberry Country Cake

This beautiful cake says summer time!  Made with lemon and orange zest, it adds a delightful addition to any gathering!  From the Barefoot Contessa cookbook “Parties”!

Strawberry Country Cake

For the cake:

3/4 cup softened butter

2 cups sugar

4 large eggs at room temperature

3/4 cup sour cream at room temperature

1/2 teaspoon lemon zest ( 1 lemon)

1/2 teaspoons orange zest ( 1 orange)

1/2 teaspoon pure vanilla extract

2 cups all-purpose flour

1/4 cup cornstarch

1/2 teaspoon salt

1 teaspoon baking soda

For the Topping:

2 cups heavy whipping cream, chilled

4 tablespoons sugar

1 teaspoon pure vanilla extract

2 pints fresh strawberries, hulled and sliced


Preheat oven to 350`.  Butter or spray two 8-inch round cake pans.

Cream the butter and sugar on high speed until light and fluffy in the bowl of an electric mixer fitted with a paddle attachment.  On medium speed, add the eggs, sour cream, zests and vanilla.  Mix well.  Sift together the flour, corn starch, soda and salt.  Add the flour mixture slowly into the batter.  Mix until just combined and smooth.

Pour batter evenly into pans, smooth tops with spatula, and bake in the center of the oven for 40-45 minutes.  Let cool in pans for 30 minutes, then remove to wire racks and let cool to room temperature.

To make filling and topping, mix the cream, sugar and vanilla with beaters until stiff peaks form.  You can either stack the cakes on each other or slice them in half, layering with 4 levels.  Place the cream on each layer, topped with berries and repeat until complete.   Serve immediately!


Garden Salads

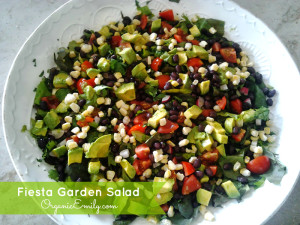
Fiesta Salad

There aren’t too many things in this world better than walking out into my own back yard using the food I grow to make delicious meals.  Whether I add a few things to a dish or make the meal mostly from what I grow I always feel a sense of satisfaction that I grew it with my own two hands!  Fun and satisfying salads in the summer are a staple in our home, especially when we have such abundance!  They are light and easy, just what we need this time of year with all the busyness of being outside and enjoying family and friends!
In the picture above is one of my favorite salads!  I call it “Fiesta Salad”!
From my garden: heirloom lettuce, spinach, radishes, cilantro

Recipe:

Leafy greens of your choice, chopped
Cilantro, chopped
Radishes, chopped
Tomatoes, chopped
1 can black beans, drained and rinsed
1 cup frozen corn
2 avocados chopped
Juice of 1 lime
Good ranch dressing
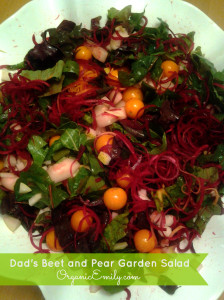
Garden Beet Salad
This is one my dad made for me.  It was so good I had to share!
From the garden: lettuce, Swiss chard, spinach, beets, sun sugar tomatoes

Recipe:

Chopped leafy greens of your choice
Spiraled beets
Chopped pears
Whole sun sugar tomatoes
Balsamic vinaigrette
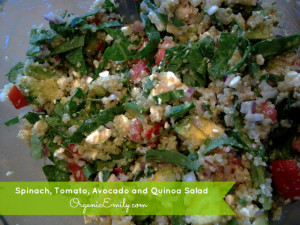
Spinach, Tomato, Avocado Quinoa Salad
This quinoa, spinach, tomato and feta salad is very satisfying!  Perfect for a light meal!
From the garden: spinach, fresh chopped basil or parsley, red onions, tomatoes

Recipe:

2 cups cooked quinoa
2 chopped avocados
2-3 large tomaotes, chopped
4 cups shredded fresh spinach
1 small red onion chopped
1 cup crumbled feta cheese
1/2 cup fresh chopped basil or parsley
Salt and pepper to taste

Growing and Using Herbs: Dill

Growing and Using Herbs: Dill

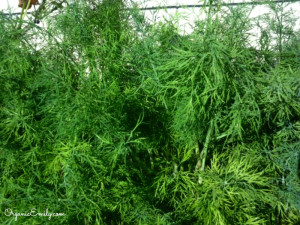
Right now in my garden, dill is at it’s peak of foliage just before going  to flower and seed in the next few weeks!   These tender leaves make a delicious and refreshing addition to many dishes including eggs, salads and fish.  Once it begins to flower, it adds a charming and whimsical addition to the garden, attracting beneficial insects and deters some of the bad bugs!

Companion Planting with Dill

In any vegetable garden, dill can benefit the members of the cabbage family, onion family, lettuce, corn, and cucumbers.  Avoid planting it with carrots and tomatoes. Many of the same insects that benefit vegetables will also benefit flowers through pollination.   Dill attracts wasps, hoverflies, tomato horn worms and honeybees.  Dill also repels aphids, mites, cabbage loopers and squash bugs. It is also one of the few annuals that can be planted with fennel which should be avoided by almost everything else.  Next year I plan on planting dill around my plum tree, currants and honeysuckle to keep the aphids away!

How to Plant Dill

Dill is probably one of the easiest things to grow!  It is another water-wise plant that needs full sun and well draining soil.   Add a little organic matter like compost to your soil to help with keeping the soil lose and free from compaction.  Dill germinates well in soil that is 60`-70` and can be planted from mid spring to early summer.  It can grow in 6 hours of sun, but will do well with more.  Dill self seeds, so you can expect it to return next year provided the soil conditions are the same.  Plant dill next to flowers with a variety of color.  Its light green stem and yellowish green flowers contrast nicely with flowers that produce dark petals, making the garden jump in color. If garden aesthetics are what you do best, sprinkle dill seeds in a variety of locations throughout your flower garden. The bouquet of flowers accentuated by sprigs of green leaves allow the vibrant colors of the flowers to stand out.  Dill not only looks beautiful but also adds a lovely fragrance to the garden.

Harvesting Dill

The best time to harvest dill is when the weather is cool or in the morning just like other herbs.  Cut the flower heads after they begin to go to seed, but be sure to let some complete the life cycle to reseed the ground or save for the following year to be placed in an intentional part of your yard.  A dill harvest is another advantage of growing this herb.  If you enjoy making pickles, grow plenty of dill. For each jar of dill pickles, at least two flower heads and several sprigs are necessary.  Dill can be planted in mid spring to early summer.   I recommend planting both times so that if you do like to pickle cucumbers, you’ll have some around for when the cucumbers are ready.

I love the flavor of dill!  Here are just a few of my favorite recipes!  Next time you make a green salad, throw some dill in, you will be delighted!


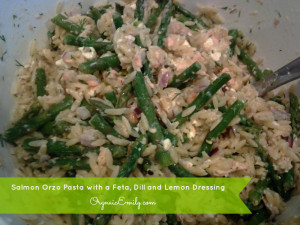
Salmon Pasta Salad with a Feta, Dill and Lemon Dressing

Salmon Orzo Pasta with a Feta, Dill and Lemon Dressing

6 cups water
1 pound asparagus, trimmed and cut into 3-inch pieces
1 cup uncooked orzo (rice shaped pasta)
1 (1 1/4 pound) skinless salmon fillet
olive oil
1/4 teaspoon salt
1/4 teaspoon freshly ground pepper
1/2 purple onion, chopped
1/2 cup feta cheese
1 tablespoon freshly chopped dill
3 tablespoons freshly squeezed lemon juice (about 1 lemon)
2-3 tablespoons olive oil
salt and pepper to taste
Bring 6 cups of water to a boil.  Add the asparagus and cook for 3 minutes.  Remove from the pan with a slotted spoon and place in large bowl.  Add the pasta to the water and cook according to directions on package.  In the meantime, drizzle salmon with a little bit of olive oil and sprinkle with salt and pepper.  Broil  for 5 minutes or until salmon is flaky.  Set aside once finished.  Add chopped onions, feta cheese, dill, lemon juice, olive oil, and salt and pepper to taste into the asparagus.  Add fish and drained pasta.  Mix thoroughly. Serve immediately.  Recipe from Cooking Light, Fresh Food Fast. pg. 105
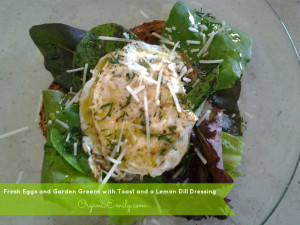
Eggs, Lemon, Dill and Toast

Fresh Eggs and Greens from the Garden with Whole Grain Organic Toast and Lemon Dill Dressing

Garden Egg Sandwich
1-2 pieces of good whole grain bread (I like to make my own or use Dave’s Organic Bread from Costco)
Fresh greens
Fresh egg, cooked to your liking
Lemon dill vinaigrette (recipe below)
2 teaspoons fresh Parmesan (optional)
Lemon Dill Vinaigrette
1 lemon zested and juiced
1 tablespoon fresh chopped dill
1/3 cup olive oil
Salt and pepper to taste

Old Fashioned Potato Salad

When it comes to potato salads, I haven’t found very many worthy of putting into my mouth.  I’m just not a fan!  However, I did try this one from Barefoot Contessa and fell in love!  It not only taste fabulous but is pretty too!

3 pounds small red potatoes
kosher salt
1 cup good mayo
1/4 cup buttermilk
2 tablespoons Dijon mustard
2 tablespoons whole-grain mustard
1/2 cup chopped fresh dill
freshly ground black pepper
1/2 cup medium-diced celery
1/2 cup small-diced red onion
Place the potatoes and 2 tablespoons salt in a large pot of water.  Bring the water to a boil, then lower the heat and simmer for 10 to 15 minutes, until the potatoes are barely tender when pierced with a knife.  Drain potatoes in a colander, then place the colander with the potatoes over the empty pot off the heat and cover with a clean, dry kitchen towel.  Leave the potatoes to steam for 15 to 20 minutes, until tender but firm.
Meanwhile, in a small bowl, whisk together the mayo, buttermilk, Dijon and whole-grain mustards, dill, 1 teaspoon salt and 1 teaspoon pepper.  Set aside.   When the potatoes are cool enough to handle, cut them into quarters or halves, depending on their size.  Place the cut potatoes in a large bowl and pour the dressing over them.  Add the celery and red onion.  Refrigerate for a few hours or up to a day to allow the flavors to blend.

Growing and Using Herbs: Oregano

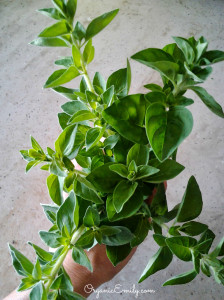
Fresh Greek Oregano

Oregano can be grown in any flower bed or vegetable garden!  It’s beautiful green leaves have a spicy fragrance and adds depth and savor to any dish!  I like Greek Oregano, it tends to have a little more heat and flavor than other varieties.  This week I harvested an entire plant before it flowered.  It will come back with a vengeance and I’ll be able to harvest again or let it flower so the bees can benefit from the plant too!  Oregano has many health benefits and is used for many purposes.  It’s  full of vitamin K, antioxidants and minerals.  It is also a natural antibiotic!

Oregano 2

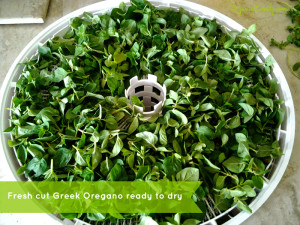
With all the oregano I harvested I decided to dry it all!  There are a few ways to dry herbs.  They can be strung up and hung upside down to dry by air.  They can be dried outside on a screen under a shady tree.  Or they can be dried in a dehydrator.  First pulling off the leaves from the stems and then placing them on a dehydrator tray.  As you can see I dried them in the dehydrator.  I first pulled all the leaves from the stems and then placed them on a tray to be dried.  I had enough to fill 8 large trays.   I set my dehydrator on the lowest setting (about 95`) and dried the oregano for 24 hours.

Dried Oregano

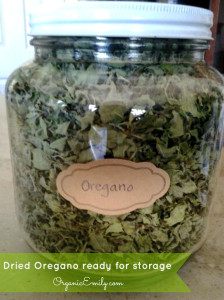
My oregano is stored in a half gallon glass jar, kept in a cool, dark room to maintain it’s potency.  We won’t use all this especially if I harvest again this year or even next year.  So I plan to divide the oregano out and put into smaller 4 oz. jars, add cute labels and give them as homemade Christmas gifts!   There are so many things we can do with herbs!  Here are a few recipes we enjoy at our house!

Fresh Herb Spaghetti

Fresh Herb Spaghetti

Olive oil for cooking

1 pound ground organic turkey

1 large yellow onion

3-4 cloves garlic, chopped

1 pound chopped baby mushrooms

Kosher salt and pepper

1 teaspoon Italian herb seasoning

2 bottles or cans (28 oz. each) crushed tomatoes

1 package cooked whole wheat pasta spaghetti noodles

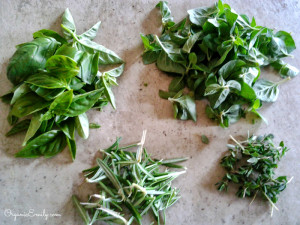
1/2 cup mixed fresh chopped herbs, like rosemary, oregano, thyme and basil

Fresh Cut Herbs

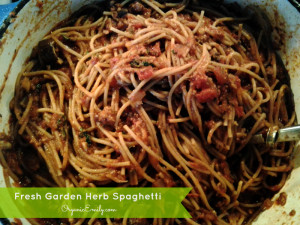
Heat oil in a large dutch oven and add ground turkey.  Add the onions and cook until lightly browned.  Add the garlic, mushrooms, kosher salt and pepper and Italian seasoning and continue to cook for a few minutes longer.  Add the crushed tomatoes and allow to simmer on medium low for 20 minutes.  In the meantime cook the noodles according to the directions on the package.  Strain the noodles and add to the pot of sauce.  Add the fresh herbs at the end and cook for just another minute or two.  Serve with fresh Parmesan or shredded mozzarella!


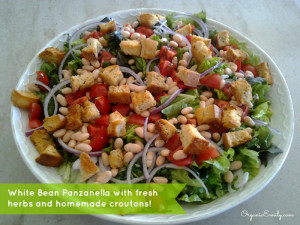
White Bean Panzanella

White Bean Panzanella

This savory salad is one of my favorites!  Made with homemade sourdough croutons, white beans and fresh herbs, it is a meal all by itself!  Perfect for a spring or summer time gathering!

1 loaf of sourdough bread, cut into bite size cubes

olive oil

kosher salt and pepper

Place the cubed bread on a rimmed baking sheet.  Drizzle olive oil and sprinkle salt and pepper over the bread.  Toss gently with hands.  Bake at 350` for about 20 minutes until golden.  Allow to cool.

In a large bowl place:

6-8 ounces of organic spring mix

1 1/2 pounds chopped tomatoes

1 can white beans, drained and rinsed

1 small red onion, halved and sliced very thin

3 tablespoons fresh chopped basil

2 tablespoons fresh chopped oregano

1/2 cup shaved Parmesan cheese

Top with cooked croutons and dress with an Italian or balsamic vinaigrette just before serving.


Harvesting and Using Broccoli

harvesting and Using Broccoli

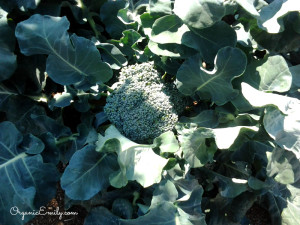
I love broccoli!  It’s so easy to grow and is such a healthy vegetable!  This year I started my seeds under lights in February and planted them in the ground the second week in March.  I haven’t had problems with pests thankfully.  But, if you have problems with cabbage worms or other bugs, cover the starts with a fabric row cover thin enough to allow light and water penetration in.  Make sure you bury the edges in the ground around the plants so the little white butterflies can’t lay their eggs on them!  If you don’t have fabric row covers or didn’t get around to putting them on in time, you can use a garlic spray to get rid of them.  Here’s the recipe:

Homemade Garlic Bug Spray

Blend 2-3 bulbs garlic in a bit of water
Add 2 cups water,
2 tablespoons plant based liquid dish soap,
1 teaspoon cayenne pepper and allow to sit over night.
Strain through a cheese cloth and put in sprayer and spray the plant thoroughly. This recipe also works well for wireworms, ants, aphids, slugs, cutworms, and caterpillars.
  Broccoli has so many health benefits!  I am grateful my kids will eat it by itself, lightly steamed.  However, if you or your loved ones don’t appreciate as much as we do, try slipping it into salads or soups for added nutrition.  Check out the 9 Benefits of Broccoli  I love that it is an alkaline food, helps prevent cancer, reduces cholesterol, and detoxes the body!

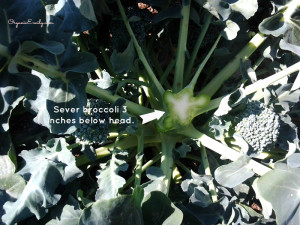
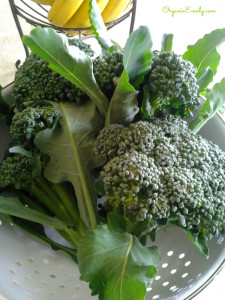
Harvesting broccoli is very simple. Once the head of the plant has grown to a medium – large size (before the head becomes loose and starts to flower) cut it off with a large kitchen knife. Notice in the picture there are little florets next to where I cut off the big one in the middle. You can let these get a little bigger and cut them off for use later or harvest now.

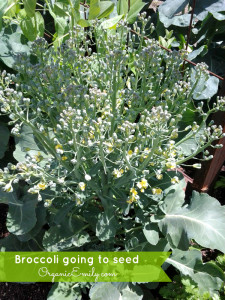
Broccoli Going to Seed

Here is a head I didn’t catch in time, so I will let it go to seed and save them for starting seeds next year or in the fall. This is Waltham broccoli (an excellent variety for Utah).

Broccoli 4

Broccoli Recipes

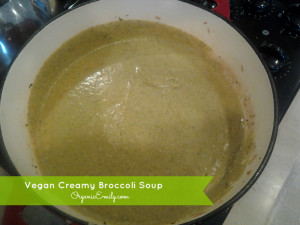
Vegan Creamy Broccoli Soup

Vegan Creamy Broccoli Soup

It’s hard to miss the cheese in this one!  It’s so good!

6 cups vegetable stock

1 cup cashews

1 medium onion, chopped

1 celery stalk, chopped

1 large carrot, chopped

2 garlic clove, chopped

1 red pepper, chopped

2 medium potatoes, peeled and chopped to 1 inch size cubes

1 large head of broccoli, chopped (about 4 cups)

2 teaspoons dried thyme

Salt and pepper to taste

Puree 1 cup of vegetable stock with the cashews in a blender until smooth.  Set aside.

In a large dutch oven saute the onion, celery and carrot over medium heat in 1 cup vegetable broth for about 5minutes, until tender crisp.  Add garlic, red pepper and potatoes.  Cook for a few more minutes.  Add the remaining 4 cups of broth and broccoli, thyme and salt and pepper.  Bring to a boil over high heat.  Cover and turn heat down to medium low and let simmer until the broccoli and potatoes are soft, about 10 minutes.  Add the cashew cream to soup and stir until mixed.  Remove from pot and puree half the soup in small batches.  You can leave some chunky or puree it all.  Serve with a crusty bread and salad!  Recipe from Forks over Knives Cookbook


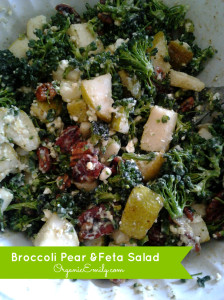
Broccoli Pear & Feta Salad

Broccoli, Pear & Feta Salad

This delicious invention came from a last minute need to put together an extra salad for a family gathering.  I have to say I was pretty proud of myself!  This was so good!  From the garden: broccoli and mint

2 Tablespoons agave

2 cups pecans halves

Coat the pecans with agave in a medium size skillet on medium-low heat.  Constantly stir for 5-10 minutes until the pecans are caramelized and slightly darkened.  Let cool.

In a bowl mix together:

1-2 heads fresh broccoli chopped into bite size pieces

4 pears chopped

1 cup crumbled feta cheese


Mint-Pepper Dressing:

In a blender puree:

1 cup peppermint or spearmint leaves

Juice of 2 lemons

4 cloves garlic

1 teaspoon peppercorns

1 teaspoon salt

1 cup olive oil

2 tablespoons agave

Pour just enough dressing to coat the salad and serve!  Save the rest of the dressing in an airtight container for up to 2 weeks.