Emily’s Skin Salve

Herbal Skin Salve

This stuff is my go to for everything! I’ve been making it for years and sharing with friends and family. There are so many stories people have shared with me about the salve that continue to surprise me. It is the best thing for sun burns, alleviating the pain, but also shortening the redness and burn time for healing. It is great for bug and allergic reactions from plants, cuts, scrapes, gashes… you name it.  One particular story really touched me. My Father in law lost a leg in Vietnam and wears a prosthetic leg. It causes sores to weep and bleed where it attaches to his leg. He tried all kinds of creams and prescriptions, but to no avail nothing worked. I gave him some of my salve to try and to all of our surprise the sores started to heal.  He keeps a jar and uses it regularly as it is the only things that helps the reoccurring problem from use. If you don’t want to make it yourself I do sell it. Just contact me through my contact page.

Recipe

Comfrey leaf and root (accelerates healing and rapid cell repair)
Calendula flower (also accelerates healing and is a natural antibiotic)
Plantain leaf (accelerates healing and draws out toxins)
Chickweed flower and leaf (soothing especially for itchy bites or stings)
St. John’s Wort fresh flower and leaves (pain relieving anti-inflamm`atory especially for burns)
Yarrow leaf and flower (natural antibiotic, antiseptic and stypic which stops bleeding)
Mullein leaf (anti-inflammatory)
Lobelia leaf and flower (antispasmodic which helps with pain and helps repair damaged nerves)
Wormwood leaf and flower (antiseptic)
Marshmallow leaf, flower and root (soothing to inflamed tissues)

You don’t have to use all of these herbs, but they do each play an important role. I prefer the solar infused method. I place each herb in a quart jar almost to the top, then cover with olive oil. Cover and let steep in the sun for 4 weeks (you can go longer if you want).  Strain all the herbs and measure the amount of infused oil you have.  Add 1/4 cup of beeswax for every cup of oil. Melt together and add essential oils of your choice. I like lavender and tea tree.  I also add vitamin E as a preservative.  Pour into jars and label. Keep in the fridge for ling term storage. Should stay good for 2 years or more if kept cold.

Natural Hand Sanitizer

Natural Hand Sanitizer

This recipe is super easy and alcohol free or if you want a little rubbing alcohol  in it you can use half witch hazel and half rubbing alcohol. I feel like the orange, lemon and tea tree essential oils do a good job disinfecting.  This recipe is also safe for small children who shouldn’t absorb rubbing alcohol into their skin as it can be too toxic for them.

Recipe

8 ounces witch hazel or 4 ounces witch hazel and 4 ounces rubbing alcohol
8 ounces aloe vera gel
20 – 30 drops each orange, lemon and tea tree essential oils

Mix everything together and pour into bottles. Label and date.

Soothing Herbal Bath Scrub

Soothing Herbal Bath ScrubSoothing Herbal Bath Scrub 1

I love this stuff! It is super hydrating, mineralizing, exfoliating and smoothing for the skin. You can easily make this large batch or cut it in half.

Recipe

Mix together in a large bowl the following ingredients.
1 cup dried calendula flowers
1 cup dried chamomile flowers
4 tablespoons dried lavender buds
2 tablespoons dried rose petals
2 cups fractionated coconut oil or sweet almond oil
2 cups Bokek Dead Sea Salt or other sea salt
4 cups Epsom Salt
40 drops lavender essential oil (optional)

Place in jars and top with a lid. Label and date. Keep in the fridge for long term storage.  Use in shower or bath after washing. Rinse and dry.

Rose and Lavender Facial and Hand Cream

Rose and Lavender Facial and Hand cream 1

This luxurious cream is heavenly! It is very hydrating, calming and great to use just before bedtime! The rose is a natural astringent and pH balancer and the lavender is cleansing and calming. This makes for great gifts and is simple to make. I like to get my ingredients from Bulk Apothecary or Whole Sale Supplies Plus, both online.

Recipe

16 oz sweet almond oil or another moisturizing oil of choice (you can infuse it with dried lavender flower buds by heating over the stove top on very low heat for an hour, then strain).
4 oz beeswax or 1/2 cup either shredded or use the beads.
16 oz rose water
20-30 drops lavender essential oil
20 drops vitamin E oil

Rose and Lavender Facial and Hand cream

Melt the beeswax and oil together. Bring to room temperature or just until it starts to set up (this part is really important). While waiting for the oil to cool, add the essential oil and vitamin E. Once cooled almost to room temp immediately pour the rose water into the oil mixture and blend with an immersion blender until thick and creamy. Pour into bottles or jars. Label and date. Keep in the fridge for long term storage.


Sore Muscle and Bruise Lotion

Sore Muscle lotion 1

This rich and soothing lotion is wonderful for massage or every day use. Be careful not to use on broken skin because it does contain the arnica plant and can poison the blood.  You can make any kind of lotion with the basics of this recipe. Use whatever kind of oil, liquid and beeswax.

Recipe

Arnica herb oil 1

Make a solar infused oil with equal parts fresh arnica flowers and leaves, dried lavender flower buds, dried marshmallow leaves, dried calendula flowers and fresh dandelion flowers.

Arnica herb oil 2

Cover with olive oil and a lid. Be sure to label. Place outside in the sun for 2 – 4 weeks. If you are in a rush, use the stove top method by heating the herbs and oil over very low heat for an hour, be careful not to burn them. Strain through a mesh cloth and strainer. For every cup of infused oil you will need 1/4 cup or 2 oz beeswax melted with the oil. Allow the oil and beeswax to come to room temperature or until it just starts to set up.

Sore Muscle lotion

At this point you can either use equal parts oil and purified water or an herbal infused tea (say for example, calendula tea). Immediately mix with an immersion blender until creamy.  Add essential oils of your liking. I like to use 40 drops of rosemary and lavender as they are also helpful for tense muscles.  Add 20-30 drops  vitamin E oil as a preservative.  Use a large syringe to squirt into bottles or jars. Label and date. Keep in the fridge for long term storage.

Black Drawing Salve

Black Drawing Salve

This salve is wonderful for drawing out an kind of infection or poison from insect bites especially. It is safe to use on animals as well.

Recipe

The first step is to make an oil infusion. This can be done either outside in the sun or over the stove top.
Solar or stove top infuse dried calendula flowers and dried plantain leaves. Place equal amounts of the herbs in a jar or small pot. Cover with 18 – 20 oz of olive oil, make sure the herbs are covered and place outside in the sun for 2 – 4 weeks. If you need it faster infuse the herbs is the same amount of oil over the stove top on very low heat for about an hour, be careful not to burn the herbs. Strain the herbs.  You should measure out 18 oz infused oil for this recipe.

For the salve you will need:
18 oz. infused calendula and plantain oil
2 oz coconut oil
4-5 oz or (1/2 cup) beeswax shredded or beads depending on how hard you want the salve to be.
4 tablespoons activated charcoal
4 tablespoons Bentonite clay
30 drops tea tree essential oil
30 drops lavender essential oil
20 drops vitamin E oil

Melt the coconut oil and beeswax with the infused oil. Test the salve to make sure it is set enough to your liking by placing some in a spoon and placing in the freezer for 2 minutes.  If it is set enough turn off the heat and add the remaining ingredients.  If not add a little more beeswax. Quickly pour into tins or jars before setting up. You can always heat it slightly to melt down if it sets up too fast. Label and date.  Keep in the fridge for long term storage.

Ear Ache Oil

rp_Earache-oil-223x300.jpg

This ear oil is fabulous and very simple, especially if you grow all the herbs listed yourself! It works really well when alternated with freshly squeezed onion juice.

Recipe

ear oil 3rp_ear-oil-2-168x300.jpg

Place equal amounts of fresh mullein flower, fresh or dried calendula flower, fresh St. John’s Wort flower and fresh chopped garlic in a small jar. Cover with olive oil by an inch or two. Cover and set outside to solar infuse for 2-4 weeks or place in a small pot over very low heat for one hour or until fragrant, be careful not to burn. Strain and pour into dropper bottle. Label and date. Keep in the fridge and warm under hot water before use.  Place 2-3 drops in the ear 3 times a day, alternating with freshly grated onion juice. This has worked very well for my family.

The Art of Tincturing

 Tincture 6Tincturing and making medicine with herbs has become a lost art in many ways.  For over a century now we have put most of our faith in conventional medicine and have forgotten how to use the herbs God has given us.  We have forgotten what it is like to connect with mother earth and what she has to offer.  As a Latter Day Saint I often reflect upon the word of wisdom given to Joseph Smith in D&C 89:10-11, “And again verily I say unto you, all wholesome herbs God hath ordained for the constitution, nature and use of man. Every herb in the season thereof, and every fruit in the season thereof; all these to be used with prudence and thanksgiving”.  I come from a family who is well immersed in the medical field and I strongly believe there is a place for both herbal or allopathic and conventional or western medicine.   One is holistic, gentle and preventative.  The other is life saving in emergencies when one suffers from acute injuries like broken bones, excessive bleeding or other major ailments like asthma attacks.  However, conventional medicine rarely treats the root of certain illnesses.  Where allopathic medicine along with lifestyle choices can be changed over time.  Herbs do work, but usually at a much longer duration then prescription drugs.  Understanding herbs gives us a sense of becoming self-sustaining and empowered.  There have been many summer mornings I have taken my kids up to the family cabin and foraged for wild herbs!  What a blessing it is to know that there are plants that can be used from our own mountains and backyards that can help heal and even stop bleeding in emergencies!  We just have to know what they are!

I have been tincturing for a few years now and always find myself in awe when they work!  I don’t know why it surprises me still, I suppose I am constantly going through a paradigm shift myself.  I love being able to take my health and my families  into my own hands through the knowledge of herbs and making medicine.   Herbs are idiosyncratic, meaning they are effective but can have different reactions for different people.  It is similar to a person with an allergic reaction to strawberries.  Are strawberries bad for everyone?  No.  They just aren’t right for that particular person.  The beauty about herbs is that they have multiple benefits and some with similarities so there usually are more than one or two options for a certain problem.  Certainly there are poisonous herbs that can be harmful and I encourage everyone to do their own research.  I really like the book by Linda Kershaw, “Edible & Medicinal Plants of the Rockies” for identification and descriptions of many of the plants that grow in the Utah area.   Most herbs that are available commercially are very safe.

There are many recipes you could use for multiple purposes.  I will share a few ideas, but it is best for you to do your own research and find what fits your lifestyle and needs.  In addition to the above book mentioned I also recommend my favorite called “Medicinal Herbs A Beginner’s Guide”, by Rosemary Gladstar.  It is a fabulous step by step guide on how to make simple herbal medicine.

Where To Begin?

There are several methods for making tinctures.  Some are very exact and precise in their measuring and weighing.  But I really like Rosemary Gladstar’s way of doing it.  It’s very easy, safe and effective!  All that is needed is a medium or base and herbs with a few pieces of equipment and amber colored bottles (I like to get mine at Industrial Container and Supply in Utah).  I prefer using dried herbs, but there are instances where fresh is required.  We’ll talk about that in a little bit.  There are a few mediums or bases to chose from.  I mostly use 1/2 vegetable glycerin, 1/2 purified water for children and babies (plus its sweet tasting) or 100 proof vodka making a stronger medicine.  The main difference between the two is that the glycerin has a shelf life of 2-3 years and the vodka has a shelf life of 25-30 years and sometimes longer.  When I think about future preparation I go with the vodka.  Apple Cider Vinegar can also be used but only has a shelf life of 1 year and is not as strong.

Tincture 7

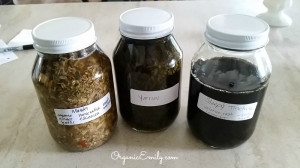
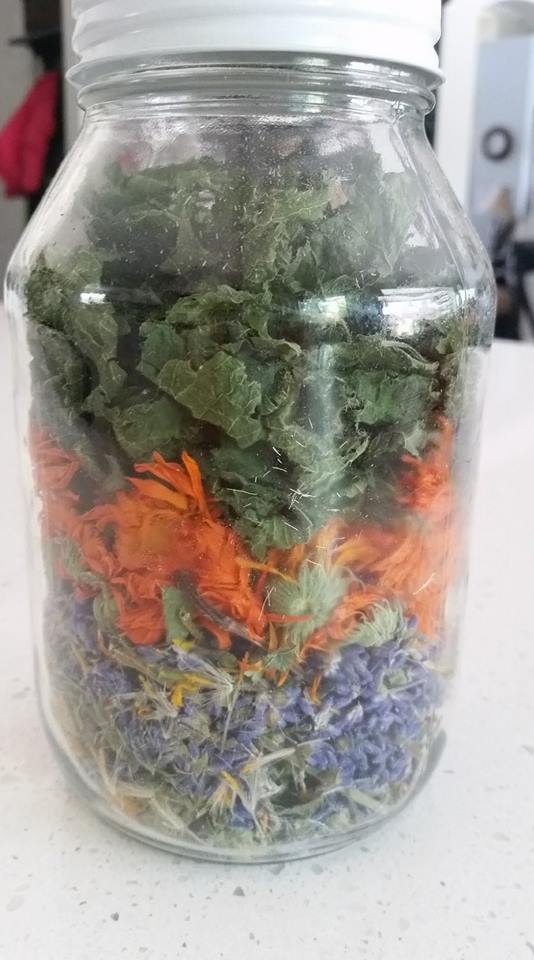
The first step is to place your herbs in a clean clear glass jar.  Pour enough alcohol over the herbs to completely cover them by 2-3 inches.  Some herbs will float to the top, but they should settle in a day or two.  As long as they are covered you should be okay.  Seal the jar with a tight fitting lid and place on counter out of direct sunlight.  Be sure to label your jars, I promise you won’t remember what’s in it in a few weeks.  Shake once a day for 6 weeks.

Tincture 2

From this point you will want to strain the herbs through a mesh strainer.

Tincture 3

You can also use a cheese cloth at the same time with the strainer or strain a second time to get rid of any extra particles.  Be sure to squeeze the herbs as much as possible to get out any extra medicine.

Tincture 4

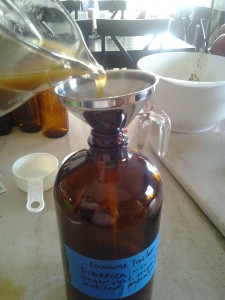
Pour through a funnel into a sterilized amber bottle.  To sterilize I spray all my equipment down with hydrogen peroxide first and let air dry.  You can also boil the equipment too.  Store in a dark cool place and don’t forget to label every bottle.

To Use

For acute problems – 1/4 to 1/2 teaspoon of herbal tincture every hour, for a total of up to 6 teaspoons daily.  1 dropperful is 1/4 teaspoon

For chronic problems – 1/2 to 1 teaspoon of tincture two to three times daily, for a total of 3 teaspoons daily. 1 dropperful is 1/4 teaspoon

Herbal Combinations

Master Cold and Flu – use equal parts, fresh cayenne pepper, fresh garlic chopped, fresh ginger chopped, fresh horseradish chopped, echinacea root, marshmallow root

Headache – equal parts dried peppermint, feverfew and chamomile

Cayenne – 90,000 IU’s cayenne pepper (very effective for stopping heart attacks and stopping bleeding when used externally)

Sleep Aid – 1 cup valerian root, 1/2 cup hops strobile (flower), 1/4 cup lavender buds

There are many other combinations that are fabulous to use.  Be sure to do your own research and find what is best for your family!  Other single herb tinctures that are a must at our house are yarrow, goldenseal and dandelion.

Homemade Cold Processed Soap

Homemade Cold Pressed SoapA friend of mine taught me how to make cold processed soap about 5 years ago and I have been making it ever since for family and friends.  This is a variation of the recipe she used and I have loved it ever since!  It lathers and cleans very well.  You can use whatever essential oils you like.  I like to use a combination of peppermint, lavender and rosemary or tea tree.

So what is soap and how is it made?  Simply put, it is a chemical reaction  between lye (sodium hydroxide) and fat (animal or plant based, usually oils) called saponification.  When mixed together in just the right amounts, it forms a salt or soap!  Hisotrically, soap was made from rendering animal fat and adding natural lye (leached from ashes) to make soap.  There were no calculators or scales way back in the day so they would add more lye to the soap just in case so it would set up.  This irritated or burned the skin sometimes, but it was better than using to little and letting the oils separate leaving all their hard work  to go to waste.  We don’t have to worry about that today with scales and calculators.  When made correctly there shouldn’t be any lye remaining in the soap.  That’s the beauty of saponification!

Here are a few resources I like to go to for supplies and recipes.

The first website is great for recipes and lye calculator  http://pinemeadows.net/

The second is great for oils, lye and molds http://wholesalesuppliesplus.com/

The third source available locally is Jone’s Bees in Salt Lake City (2586 w. 500 s.) for lye and other oils

Supplies

One large glass bowl or heat resistant plastic bowl (for lye)
One very large metal pot for gently heating oils
One scale (preferably electric)
One electric blending stick or wooden spoon
One instant read thermometer
Rubber Gloves
Goggles
Newspaper/paper towels to put down on your counter to protect it from lye
molds to pour soap (I used a cardboard box lined with a large garbage bag)
Vinegar, in case lye gets on your skin and you need to relieve the burn


Recipe

40 oz. coconut oil
32 oz. palm oil
24 oz. olive oil
12 oz. avocado, grape seed or jojoba oil
4 oz. cocoa butter
16 oz. lye (sodium hydroxide)
52 oz. distilled water
1.5 oz essential oils (optional)

Put on your gloves and goggles with newspaper under the counter to protect it from the chemical reaction between lye and water.

*Warning!!! Always add lye to liquid, NOT liquid to lye!!!

Measure by weight in your scale the right amount of water, put it into bowl, then measure lye and carefully add to water. Mix with wooden spoon thoroughly, (open a window to allow airflow from fumes) and set aside.

Measure oils by weight and place in pot over a very low heat just until melted. You can use the blending stick to help break up the oils. Be careful to do it slowly and do not raise temp higher than lye temp mixture.

Check the temp of both lye and oil separately of course. When both are in between 125`- 100` then they are ready to come together. (Keep them as close together in temp as possible) Carefully add your lye mixture to the oil mixture without splashing. (I actually used a very large 6 gallon bucket) Start to mix thoroughly with blending stick or wooden spoon, (perfect time to add essential oils) until it starts to trail (leaving a trail of soap behind when it drizzles off the spoon). It will harden quickly! When this happens it is ready to pour, again be careful not to splash. Cover soap with plastic wrap and blankets to keep from cooling to quickly. Soap should be ready to cut within 24-48 hours. Once cut stack on a cooling rack allowing for air flow. Do not use soap for 4-6 weeks while it cures. Enjoy! Let me know if you have any questions. ! 🙂


Simplified Recipe

41 oz. coconut oil

47 oz. olive oil

47 oz. palm or palm kernel oil

20 oz. lye

47 oz. water

Follow the same directions as above.  Makes about 40 regular size bars.

Herbal Burn and Wound Salve

Homemade Wound and Burn SalveThis is one of those homemade medicinal concoctions that work really well and is very helpful to know in case you can’t get immediate medical attention.  It’s perfect for cuts, scrapes, burns and more.  There are a few steps you have to take before applying the burn/wound salve itself if you are dealing with deep cuts.

First thing you need to do is to stop the bleeding with cayenne pepper.  Cayenne is an amazing herb and should be in everyone’s first aid kits!  It increases circulation inside the body, but stops bleeding outside of it!  Depending on how deep the cut is, the sting of applying cayenne pepper to the injury may or may not hurt.  My little 3 year old has received some pretty deep cuts the last 2 years from playing rough with her siblings.  We applied the cayenne (powder) to stop the bleeding first (which by the way also disinfects) and then reapplied the salve 3x a day.  She healed very well with no scars!

Recipe

The wound salve has equal parts of 3 ingredients;

Fresh leaves (if available) or dried root of the comfrey plant.   Comfrey  is also known as “knit bone”, it has been used to close wounds and heal broken bones for many years.  If you don’t grow comfrey you can use powdered comfrey root from any health food store.

Wheat germ oil helps to promote new cell growth aiding in the healing process to prevent scarring.

Honey has been used to aid with burns for many years.  It is a natural antibiotic and reduces inflammation.

You can make any adjustsments with the recipe to make a thick salve.

Blend all ingredients together if using fresh comfrey leaves or just a fork if using the powdered root of comfrey.  Keep in an airtight container and refridgerate.  It will stay good for one month.